How Do I Choose the Right Sandpaper for a DIY Project?

When it comes to DIY projects, choosing the right sandpaper can make all the difference between a smooth, professional finish and a frustrating, uneven surface. Whether you're refurbishing furniture, building a wooden shelf, or tackling a metalwork project, understanding the various types of sandpaper and their specific uses is crucial. In this comprehensive guide, we'll walk you through everything you need to know about selecting the best sandpaper for your DIY tasks, considering factors like the material being sanded, the desired finish, and the project scope.
Understanding Sandpaper Basics
Sandpaper is a tool that consists of abrasive particles glued to a flexible backing paper. The abrasiveness of sandpaper is measured in grits, with lower numbers indicating coarser abrasives and higher numbers indicating finer abrasives. Here's a quick breakdown of the grit scale:
- 60-80 Grit: Coarse, for heavy material removal
- 100-150 Grit: Medium, for general sanding and smoothing surfaces
- 180-220 Grit: Fine, for final sanding before finishing
- 320 and higher: Extra fine, for polishing and fine finishing
The type of abrasive material used in sandpaper is another critical factor in determining its effectiveness for specific tasks. The most common types are aluminum oxide and silicon carbide, each offering unique advantages.
The Versatility of Aluminum Oxide
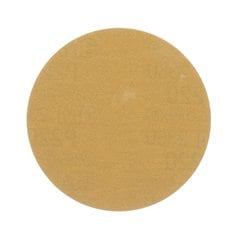
Aluminum oxide sandpaper is versatile and durable, making it suitable for sanding both wood and metal. This type of sandpaper is self-sharpening, meaning the grains break down during use to expose new, sharp edges, ensuring a consistent sanding action. Brands like Klingspor, 3M, and SIA offer high-quality aluminum oxide sandpapers perfect for various DIY projects.
Aluminum oxide is particularly advantageous for beginners due to its adaptability. For instance, if you’re working on a wooden table and encounter a stubborn paint layer, aluminum oxide sandpaper will effectively remove it while also preparing the wood for a smooth finish. Its durability ensures that the sandpaper lasts longer, making it a cost-effective choice for extensive projects.
The Effectiveness of Silicon Carbide
Silicon carbide sandpaper is known for its sharpness and is ideal for wet sanding and finishing applications. It can be used on a variety of materials, including plastic, metal, and even glass. This type of sandpaper is excellent for achieving a smooth, polished finish. Saint Gobain/Norton and Sait provide top-notch silicon carbide options.
Wet sanding with silicon carbide is especially useful for automotive projects or any tasks requiring a high-gloss finish. The water helps to reduce dust and prevents the sandpaper from clogging, allowing for a finer finish. For instance, when wet sanding a car panel, the silicon carbide paper can remove minor scratches and imperfections, resulting in a sleek, polished look.
Other Abrasive Materials
While aluminum oxide and silicon carbide are the most common, there are other abrasive materials worth noting:
- Garnet: Often used for woodworking, garnet sandpaper produces a fine, smooth finish but wears out more quickly than aluminum oxide.
- Ceramic: This is a more expensive option, known for its durability and effectiveness in heavy-duty sanding tasks.
Choosing the Right Sandpaper for Your DIY Project
Selecting the appropriate sandpaper involves understanding the specific needs of your project. Different materials and desired finishes require different approaches. Here’s how you can choose the right sandpaper for various common DIY tasks.
Sanding Wood

Woodworking projects can range from simple refinishing to complex furniture building. The sandpaper you choose will greatly influence the outcome of your project.
Initial Sanding
For rough shaping and removing old finishes or paint from wood, 60-80 grit aluminum oxide sandpaper is ideal. This coarse grit is excellent for leveling surfaces and eliminating imperfections. For example, if you're refurbishing an old wooden chair, starting with a coarse grit will help you strip away the old varnish quickly.
Smoothing the Surface
Once the initial sanding is complete, transitioning to 100-150 grit sandpaper helps smooth out the surface. This medium grit sandpaper removes the scratches left by the coarse grit and begins to prepare the wood for finishing. In the case of the wooden chair, this stage will smooth out the rough texture, making it ready for the next steps.
Preparing for Finish
For the final sanding before applying finishes like paint, stain, or varnish, 180-220 grit sandpaper should be used. This fine grit ensures a smooth surface, ready to accept the finish evenly. A well-sanded surface absorbs finishes better, resulting in a more professional look. For instance, after sanding a table with 180-220 grit sandpaper, the wood will be smooth and uniform, allowing the stain to penetrate evenly.
Sanding Metal
Metal surfaces often require a different approach due to their hardness and the potential for rust. Selecting the right sandpaper is crucial to achieving a smooth and polished finish.
Rust and Paint Removal
Starting with 80-120 grit aluminum oxide sandpaper is effective for removing rust and old paint from metal surfaces. This grit is aggressive enough to strip away corrosion and coatings, preparing the metal for further sanding. For example, if you're restoring a metal garden bench, this grit will help remove rust spots and old paint layers.
Surface Smoothing
To smooth the metal surface, use 150-220 grit sandpaper. This prepares the metal for any finishing processes, such as painting or polishing. This stage is crucial for achieving a uniform surface. When working on a metal bench, this grit will help smooth out the rough areas, creating a cleaner surface for painting.
Finishing Touches
For a polished look, finish with 320 grit or higher silicon carbide sandpaper, especially for wet sanding. This extra fine grit polishes the metal to a smooth, shiny finish. Wet sanding reduces dust and ensures a high-quality finish. For example, when wet sanding a car’s body panel, using a 320+ grit will help achieve a sleek, reflective surface.
Specialty Projects
Certain projects require specialized approaches to achieve the best results. Wet sanding and working with plastic or drywall have unique considerations.
Wet Sanding
Wet sanding is used to achieve a very smooth finish, often in automotive and plastic projects. Silicon carbide sandpaper is the go-to choice for wet sanding due to its ability to handle water without clogging.
Wet sanding helps reduce dust and provides a finer finish by using water as a lubricant. This technique is particularly useful for automotive projects. For example, when wet sanding a car’s paint job, starting with 400 grit silicon carbide sandpaper will smooth out the surface without causing deep scratches. Progressing to finer grits, such as 600, 800, and even 1000 grit, will ensure an ultra-smooth, polished finish.
Sanding Plastic
Plastic surfaces require a careful approach to avoid melting or scratching. Using the right sandpaper can make a significant difference in achieving a smooth finish.
Start with 220-320 grit silicon carbide sandpaper. This fine grit is gentle enough to avoid damaging the plastic. For instance, if you're smoothing the edges of a plastic model, this grit will help create a clean, smooth surface. Moving to 400-600 grit for a smooth, even finish ensures the plastic is ready for any further processing or use, such as painting or assembling.
Sanding Drywall
For drywall projects, the goal is to create a smooth surface for painting or wallpapering. The right sandpaper can help achieve this efficiently.
Use 120-150 grit aluminum oxide sandpaper to sand joint compound. This grit is coarse enough to smooth out the compound without damaging the drywall. For instance, when preparing a wall for painting, this grit will help level the compound seams. Finish with 220 grit for a seamless, smooth surface, ensuring the wall is perfectly prepared for painting or other finishes.
Common Mistakes to Avoid

Choosing the right sandpaper is crucial, but using it correctly is just as important. Here are some common mistakes to avoid:
- Skipping Grits: Jumping from a very coarse grit to a very fine grit can leave visible scratches and uneven surfaces. Always progress through the grits sequentially to ensure a smooth transition and avoid surface damage.
- Using the Wrong Type: Using wood sandpaper on metal or vice versa can lead to poor results and damaged sandpaper. Always match the type of sandpaper to your material to ensure effectiveness and longevity.
- Applying Too Much Pressure: Let the sandpaper do the work. Applying excessive pressure can lead to uneven sanding, grooves in the material, and quick wear-out of the sandpaper.
- Not Replacing Sandpaper: Dull sandpaper won't sand effectively. Replace your sandpaper as soon as it stops being effective to maintain the quality of your sanding.
- Neglecting Safety: Always wear protective gear such as masks and goggles. Sanding generates dust and particles that can be harmful if inhaled or if they come into contact with your eyes.
Summarizing Key Points
Here's a quick reference chart to help you select the right sandpaper for your next DIY project:
|
Material |
Initial Sanding |
Smoothing Surface |
Final Sanding/Finish |
|
Wood |
60-80 Grit (Aluminum Oxide) |
100-150 Grit (Aluminum Oxide) |
180-220 Grit (Aluminum Oxide) |
|
Metal |
80-120 Grit (Aluminum Oxide) |
150-220 Grit (Aluminum Oxide) |
320+ Grit (Silicon Carbide) |
|
Wet Sanding |
400 Grit (Silicon Carbide) |
600-800 Grit (Silicon Carbide) |
1000+ Grit (Silicon Carbide) |
|
Plastic |
220-320 Grit (Silicon Carbide) |
400-600 Grit (Silicon Carbide) |
800+ Grit (Silicon Carbide) |
|
Drywall |
120-150 Grit (Aluminum Oxide) |
220 Grit (Aluminum Oxide) |
N/A |
Tips for Best Results
Achieving the best results from your sanding efforts involves more than just choosing the right sandpaper. Here are some additional tips to ensure success:
- Use a Sanding Block or Holder: This ensures even pressure and avoids creating grooves. Sanding blocks provide a firm backing for the sandpaper, helping to maintain a flat, even surface.
- Sand with the Grain: When sanding wood, always go with the grain to prevent scratches. Sanding against the grain can create unsightly scratches that are difficult to remove.
- Keep it Clean: Regularly clean the surface and sandpaper to avoid clogging. Clogged sandpaper can reduce its effectiveness and lead to uneven sanding.
- Proper Ventilation: Sanding can produce a lot of dust. Work in a well-ventilated area and consider using a dust mask to protect your respiratory system.
- Check Your Progress: Frequently stop to check your work. This helps you to see if you’re removing too much material or if you need to change grits.
- Use the Right Tools: For larger surfaces, consider using power sanders. They can save time and effort, but always start with a finer grit to avoid removing too much material too quickly.
Brand Recommendations
Selecting a reliable brand can also impact the quality of your sanding project. Here are some top brands known for their quality sandpaper products:
- Klingspor: Known for their durability and performance, Klingspor sandpapers are excellent for both wood and metal.
- 3M: A trusted name in abrasives, 3M offers a wide range of sandpapers suitable for various applications.
- SIA: SIA sandpapers are known for their high quality and are particularly good for woodworking.
- Sait: Specializing in both industrial and DIY applications, Sait provides durable sandpapers for tough tasks.
- Saint Gobain/Norton: These sandpapers are renowned for their reliability and effectiveness, especially in wet sanding and finishing.
Conclusion
Choosing the right sandpaper is essential for any DIY project, whether you're working with wood, metal, or other materials. By understanding the different types of sandpaper, their applications, and following a step-by-step approach, you can achieve a professional finish every time. Brands like Klingspor, 3M, SIA, Sait, and Saint Gobain/Norton offer high-quality sandpapers that cater to a wide range of DIY needs.
For more information and to purchase the best sandpaper products for your projects, visit The Sandpaper People website or contact our knowledgeable customer service representatives. Happy sanding!






Leave a comment